# Automation
FluentCRM's automation module is the most powerful tool in FluentCRM, helping you set up workflows that react to user actions and system events. You can use it to send emails, update contact details, and track goals automatically. This makes it easier to engage with your audience and manage marketing tasks without manual effort.
# Overview
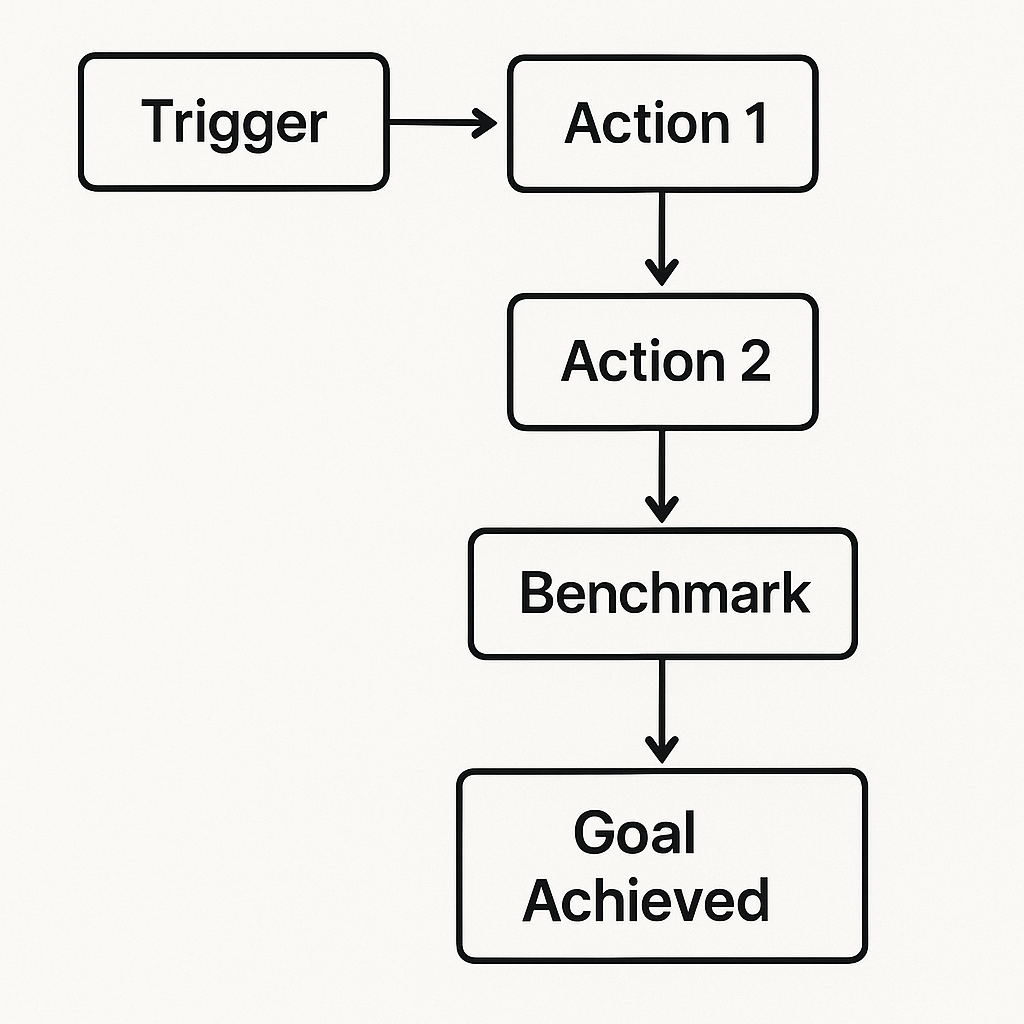
FluentCRM's automation system operates on a simple yet powerful concept: Triggers initiate workflows, Actions perform tasks, and Benchmarks define completion goals. This three-component architecture provides flexibility and control over your automation strategies.
# Automation Flow Diagram
The following diagram illustrates how automation components work together:
# Core Components
# 1. Triggers
Triggers are events that initiate automated workflows. They represent user behaviors or system events that should start a sequence of actions.
Common Examples:
- User subscribes to a newsletter
- User purchases a product
- User abandons a cart
- User visits a specific page
- User clicks an email link
Learn more about creating custom triggers →
# 2. Actions
Actions are automated tasks performed in response to triggers. They represent what your system does to engage with users or update data.
Common Examples:
- Send welcome emails
- Add/remove tags
- Update contact information
- Enroll in courses
- Send SMS notifications
- Create tasks for team members
Learn more about creating custom actions →
# 3. Benchmarks
Benchmarks represent goals or completion criteria for your automation workflows. They define when an automation sequence has achieved its intended outcome.
Common Examples:
- User makes a purchase
- User completes a course
- User clicks a specific link
- Specific tags are applied
- Time-based goals are met
Learn more about creating custom benchmarks →
# How Automation Workflows Work
- Initiation: A trigger event occurs (e.g., user subscribes)
- Processing: One or more actions are executed in sequence
- Evaluation: The system checks if benchmark conditions are met
- Completion: When benchmark is achieved, the automation concludes
# Getting Started
To begin building custom automation components for FluentCRM:
- Understand the Architecture: Review how triggers, actions, and benchmarks work together
- Choose Your Component: Decide whether you need a trigger, action, or benchmark
- Extend Base Classes: Use FluentCRM's base classes for your custom components
- Implement Required Methods: Follow the interface requirements for each component type
- Register Your Component: Add your custom component to FluentCRM's automation system
# Best Practices
- Make actions atomic: Each action should perform a single, well-defined task
- Handle edge cases: Account for scenarios where users don't follow expected paths
- Test thoroughly: Validate your automations with real user scenarios
# Next Steps
Ready to build your first custom automation component? Start with these guides:
- Creating Custom Triggers - Learn to detect and respond to events
- Building Custom Actions - Automate tasks and user interactions
- Defining Custom Benchmarks - Set and track automation goals
Trigger →